Amazon S3
We have file storage support built-in with Amazon S3 that can be configured without any coding. Follow these steps to set up your S3 file storage.
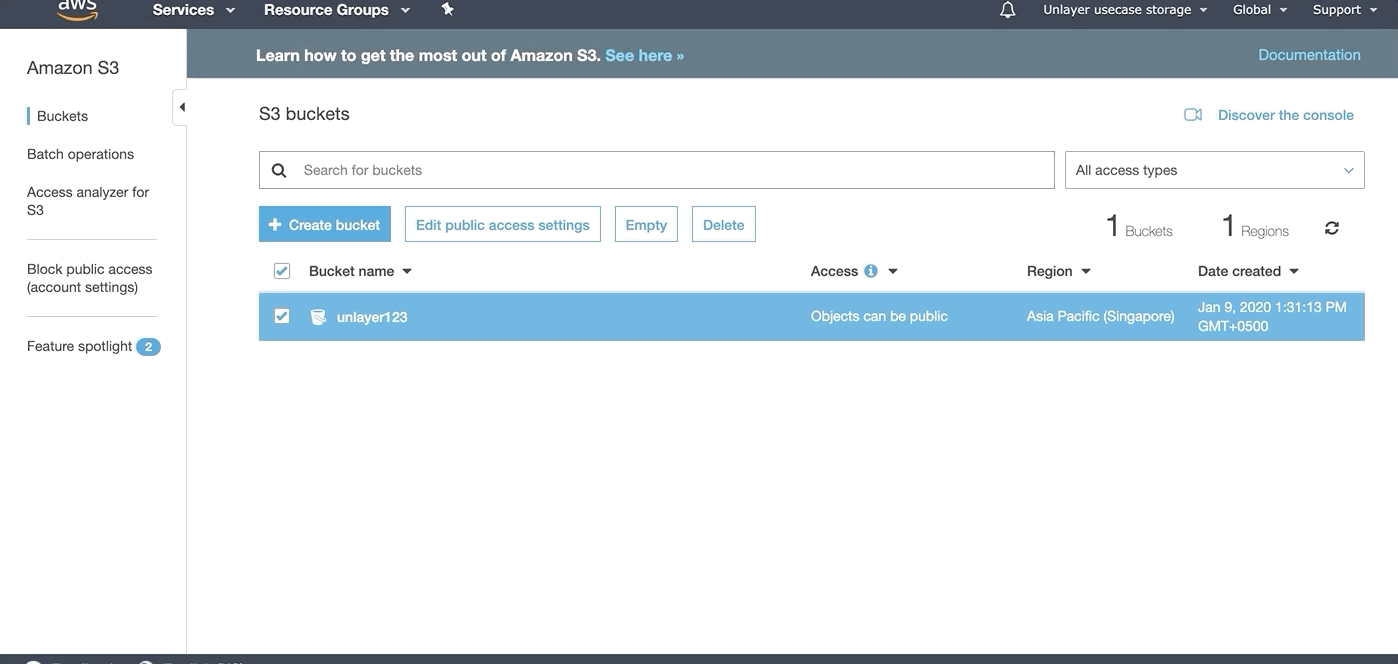
Create S3 Bucket
If you already have a S3 bucket, skip this step.
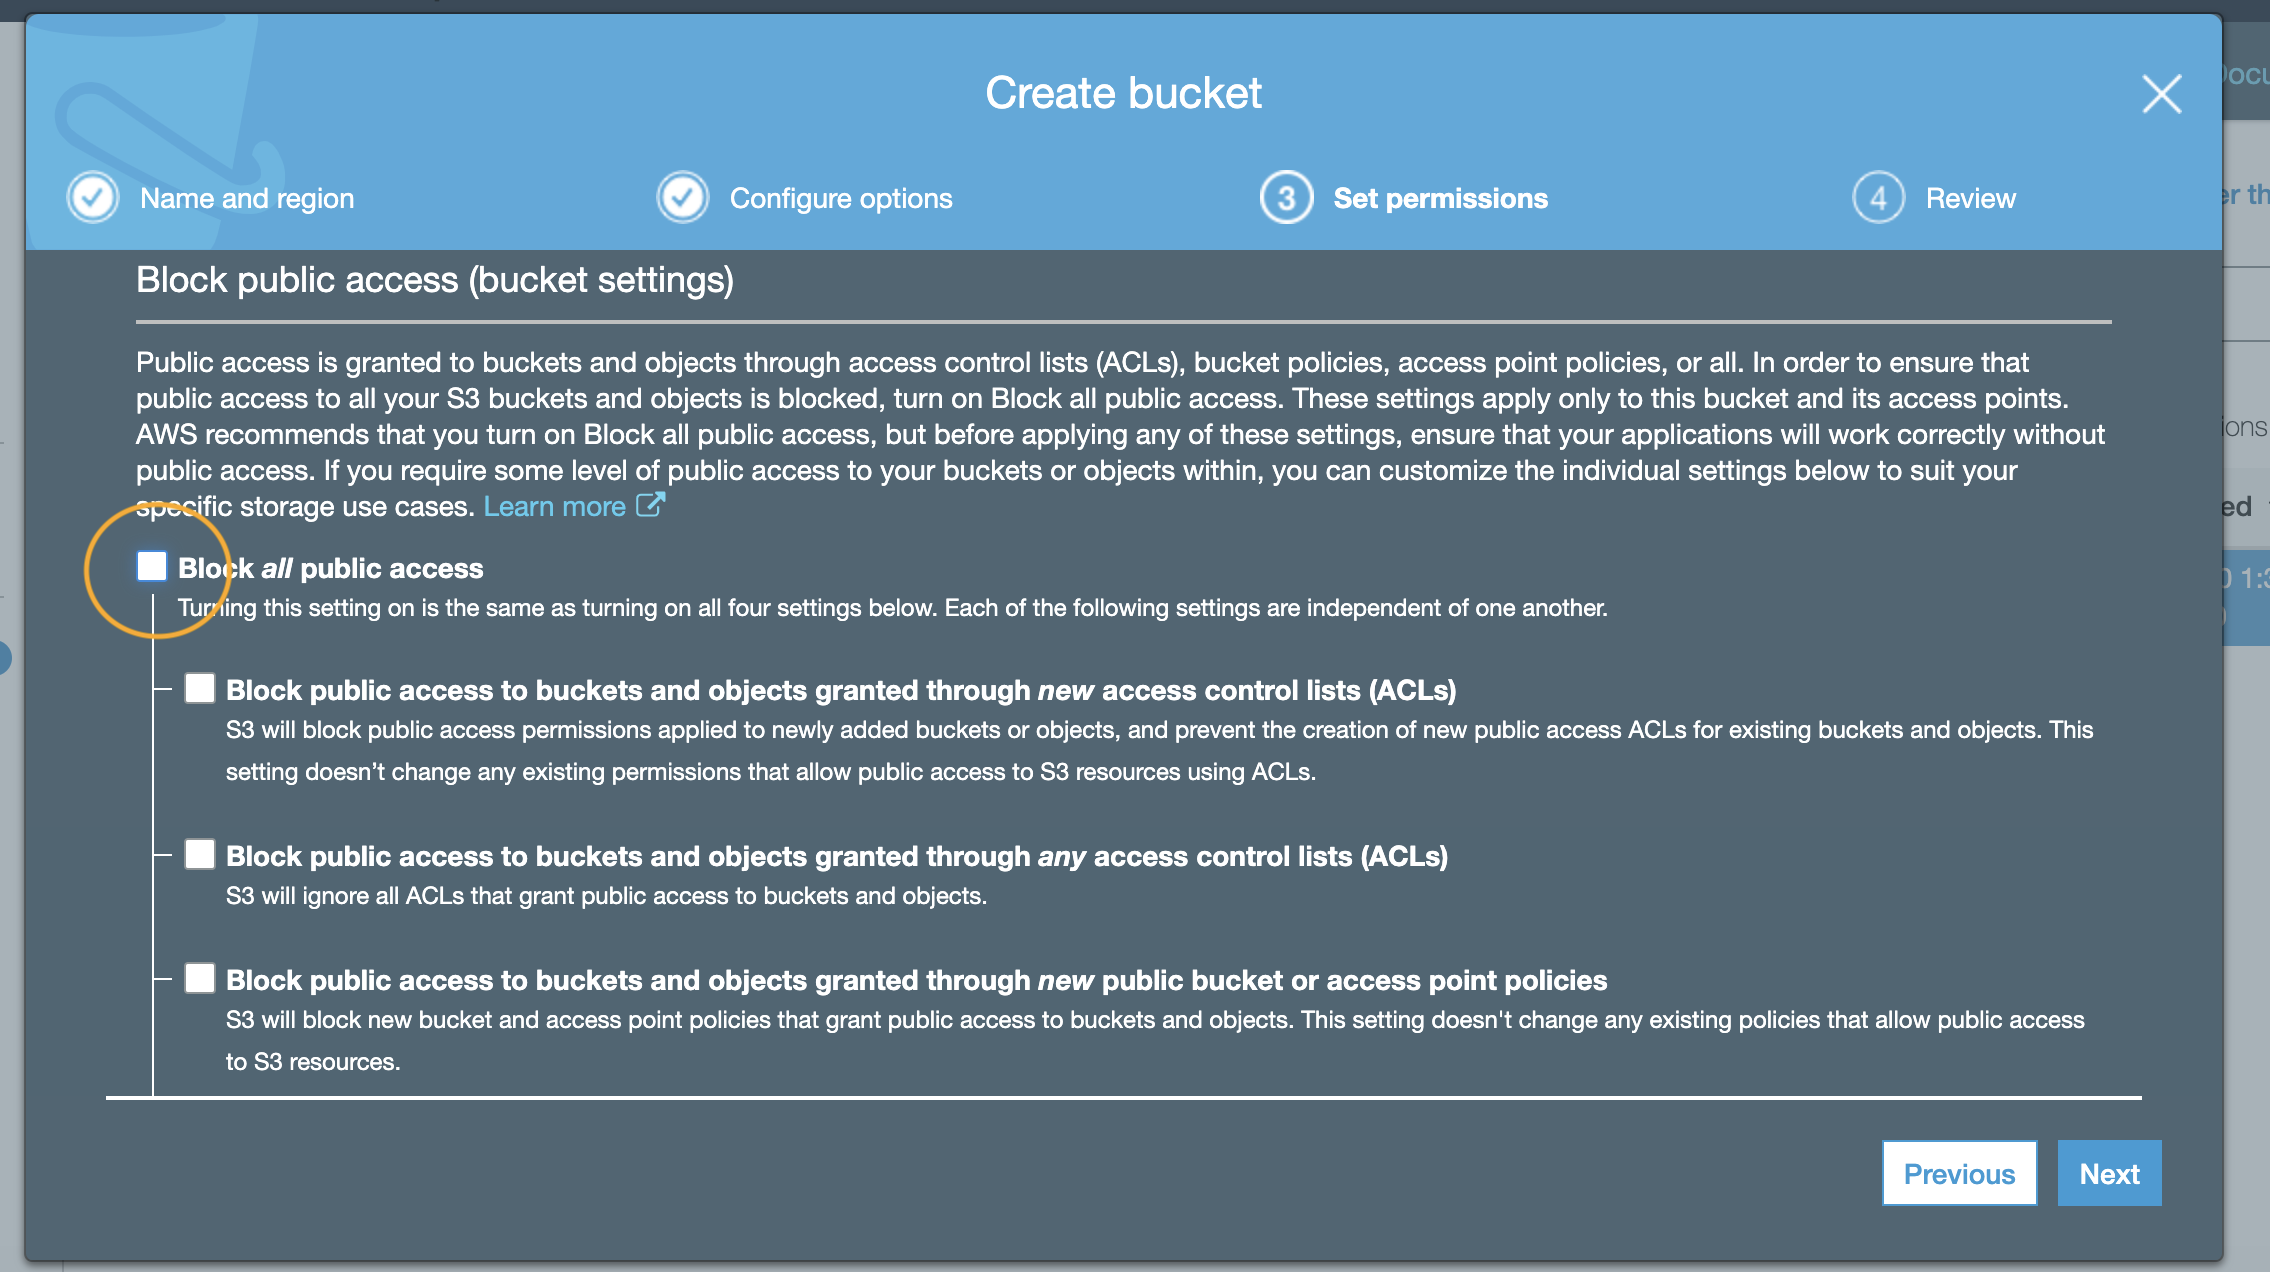
The first step is to create a bucket in your AWS S3 console. You need to uncheck "'Block all public access" for S3 storage.
Create IAM User
If you already have access key id and secret access key, skip this step.
Go to your AWS IAM console and create a new user with Programmatic Access so you can get the access key id and secret access key.
Attach Policy and Permissions
If possible, attach the AmazonS3FullAccess policy to the user. However, if you want to give a minimum set of permissions, use the following policy:
Make sure to replace BUCKET-NAME with your actual bucket name.
{
  "Version": "2012-10-17",
  "Statement": [
    {
      "Sid": "VisualEditor0",
      "Effect": "Allow",
      "Action": [
        "s3:GetBucketPublicAccessBlock",
        "s3:PutObject",
        "s3:GetObject",
        "s3:PutBucketPublicAccessBlock",
        "s3:GetBucketCORS",
        "s3:ListBucket",
        "s3:PutBucketCORS",
        "s3:GetBucketAcl",
        "s3:GetBucketLocation",
        "s3:PutObjectAcl",
        "s3:PutBucketTagging"
      ],
      "Resource": ["arn:aws:s3:::BUCKET-NAME/*", "arn:aws:s3:::BUCKET-NAME"]
    },
    {
      "Sid": "VisualEditor1",
      "Effect": "Allow",
      "Action": "s3:ListAllMyBuckets",
      "Resource": "*"
    }
  ]
}
Confirm Public Access is Not Blocked
Your S3 Bucket must have public access enabled so users can access the uploaded images.
- Go to S3 in AWS Console
- Select your S3 Bucket
- Click Edit public access settings
- Uncheck Block all public access if it's checked
- Update the Object Ownership on your bucket to be Object Writer.
- Click Save
Enable CORS for your S3 Bucket
Your S3 Bucket must have CORS (cross-origin resource sharing) enabled. Follow these steps:
- Go to your S3 Bucket in AWS Console
- Click the Permissions tab
- Click the CORS Configuration button
- Add the following in the configuration editor
[
  {
    "AllowedHeaders": ["*"],
    "AllowedMethods": ["GET", "PUT", "POST", "DELETE"],
    "AllowedOrigins": ["https://*.unlayer.com"],
    "ExposeHeaders": []
  }
]
<?xml version="1.0" encoding="UTF-8"?>
<CORSConfiguration xmlns="http://s3.amazonaws.com/doc/2006-03-01/">
<CORSRule>
    <AllowedOrigin>https://*.unlayer.com</AllowedOrigin>
    <AllowedMethod>GET</AllowedMethod>
    <AllowedMethod>HEAD</AllowedMethod>
    <AllowedMethod>PUT</AllowedMethod>
    <AllowedMethod>POST</AllowedMethod>
</CORSRule>
</CORSConfiguration>
Add Credentials in your Unlayer Project
Simply enter your information of S3 storage against your project. For this:
- Login to Unlayer dashboard
- Select your Project
- Click Settings in the navigation bar and select the Storage tab
- Click the Add Storage button
- Enter your Access Key Id, Secret Access Key, and Bucket
- Check Primary Storage at the end

Test your File Storage
Click the Test Storage button and see if all the items are working properly. If any of these are red, the storage will not work. In that case, please make sure all permissions are properly attached and the bucket exists in the correct region.
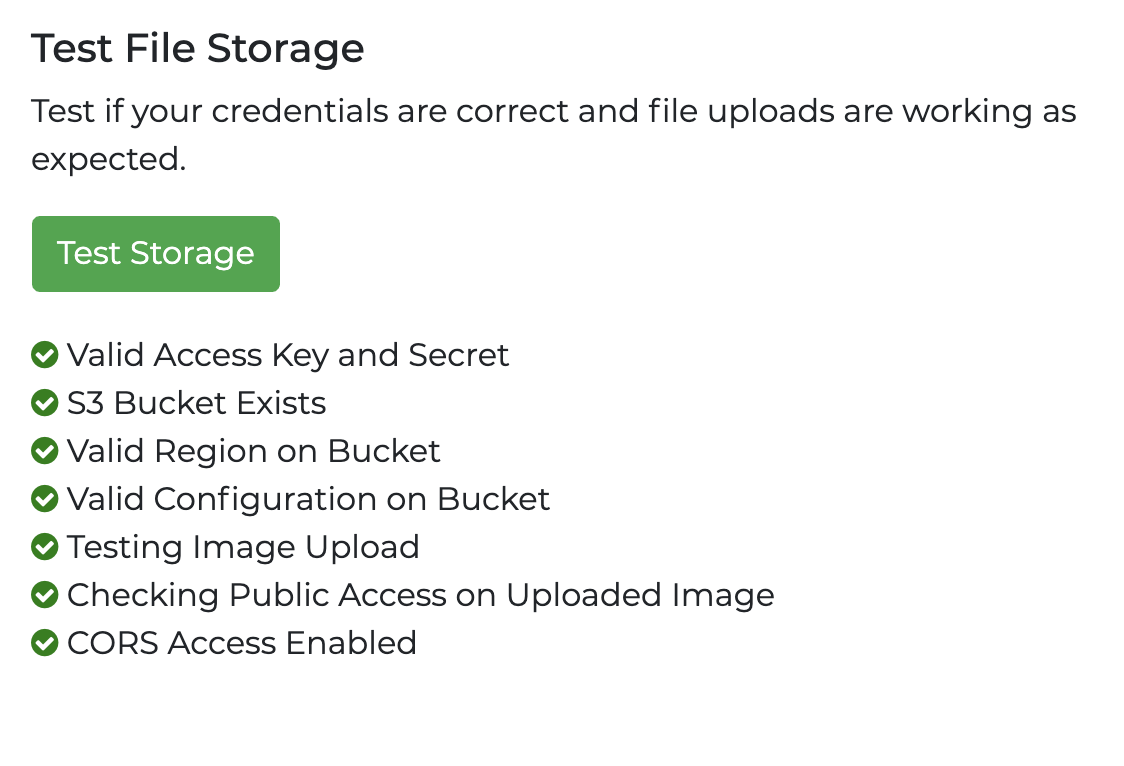
In some cases, we attempt to fix certain permissions so you can try clicking Test Storage multiple times.
Connect your CDN (Optional)
You can connect your CDN (content delivery network) such as Cloudfront (or any other) with your storage. It will add caching and load images faster.
Note: Your CDN must be set up to access your S3 Bucket.
- Login to Unlayer dashboard
- Select your Project
- Click Settings in the navigation bar and select the Storage tab
- Choose your connected storage
- In URL Prefix, add the root URL to your CDN such as
https://cdn.mydomain.com/ - Optionally, you can also add a path prefix if the URL path also changes
That's it. You are all set 😀
Troubleshooting
If your files are not being uploaded to your S3 bucket correctly, check these:
- Make sure the storage is marked as Primary.
- You must pass projectId when initializing the editor.
<script type="text/javascript">
unlayer.init({
  id: "editor",
  projectId: XXXX // Add your projectId from Settings
});
</script>
- Make sure the domain you are running the editor on is added under Allowed Domains in your project settings > Embed.