Display Conditions
This feature is only available in paid plans. Learn More
The Display Conditions feature allows your end-users to show or hide specific content in an email based on customizable conditions. This is useful for creating personalized email campaigns that adapt to recipients’ behaviors or attributes, such as gender, purchase history, location, or preferences.
End-users can choose display conditions for different blocks when designing their emails, ensuring that recipients see tailored content based on predefined rules.

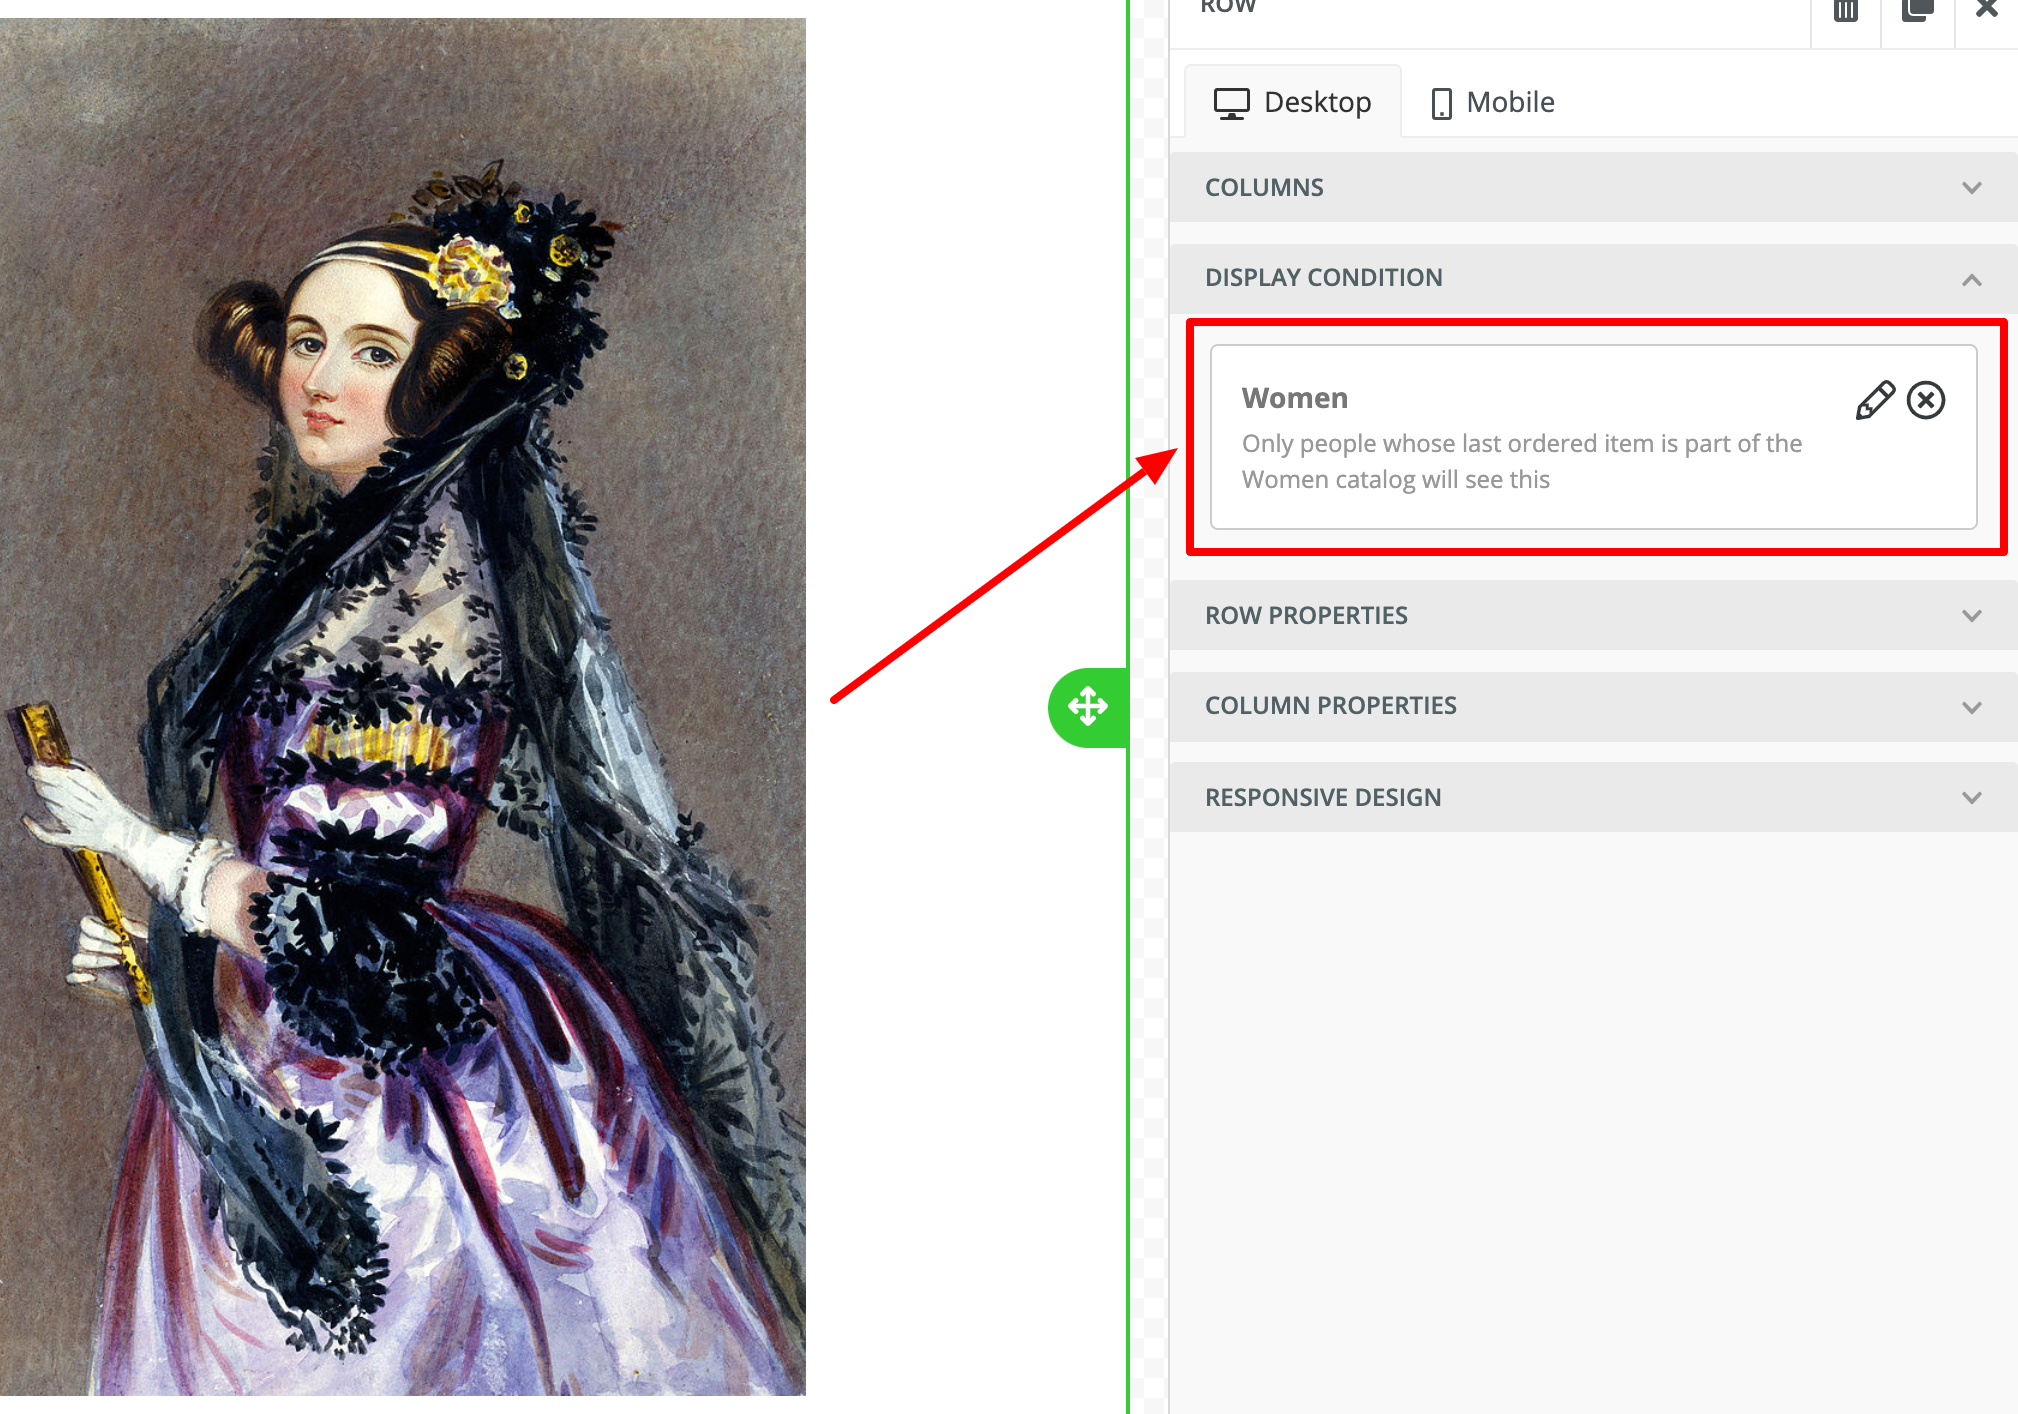
Your users will have the ability to pick a condition and apply it to a row so they can show different content based on who the audience is.
Enable Feature
The unlayer.setDisplayConditions API lets you define display conditions that users can apply to email blocks. Each condition specifies content visibility based on a particular rule, such as a user’s last order catalog or any custom attribute you define.
Example: Setting Display Conditions
unlayer.setDisplayConditions([
  {
    type: 'Last Order Catalog',
    label: 'Women',
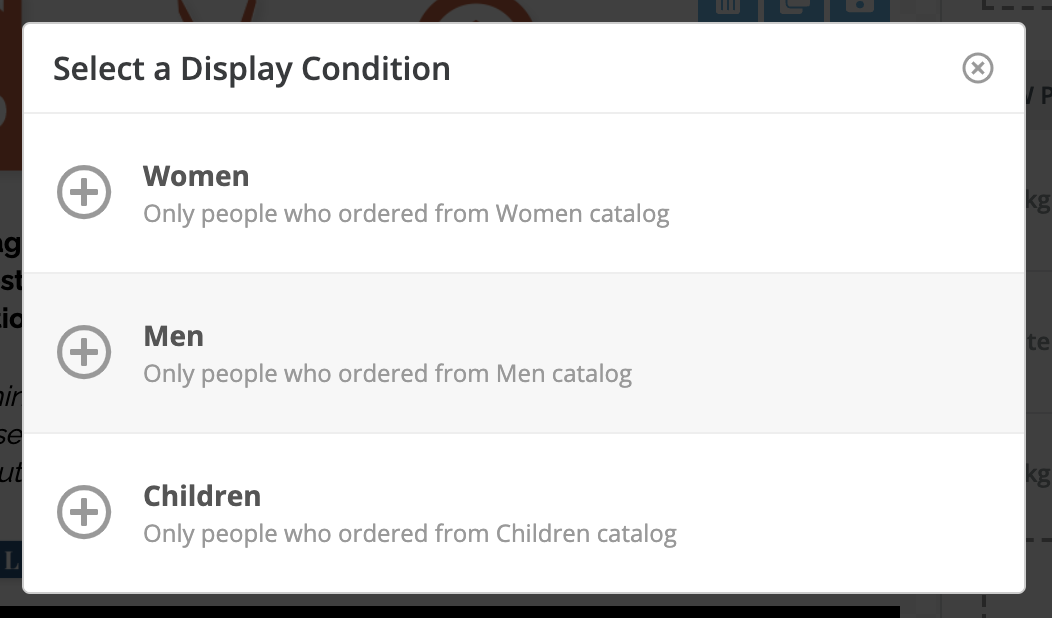
    description: 'Only people who ordered from Women catalog',
    before: "{% if lastOrder.catalog == 'Women' %}",
    after: '{% endif %}',
  },
  {
    type: 'Last Order Catalog',
    label: 'Men',
    description: 'Only people who ordered from Men catalog',
    before: "{% if lastOrder.catalog == 'Men' %}",
    after: '{% endif %}',
  },
  {
    type: 'Last Order Catalog',
    label: 'Children',
    description: 'Only people who ordered from Children catalog',
    before: "{% if lastOrder.catalog == 'Children' %}",
    after: '{% endif %}',
  },
]);
This example creates three conditions based on the recipient’s last order catalog. End-users can apply these conditions to different email blocks, so that each block will only be displayed to recipients who meet the selected condition.
Your end-users will see these options in a modal.

Attributes for Display Conditions
Each display condition must have the following attributes. You can also send any custom attributes to identify the condition.
| Attribute | Description |
|---|---|
| type | A category to group multiple conditions into folders. End-users will select the condition type first. |
| label | The name of the condition that the user will see. |
| description | A description of the condition that will help users understand when it applies. |
| before | The opening syntax for the condition (e.g., an opening tag or logic statement). This will be added before the selected row. |
| after | The closing syntax for the condition (e.g., a closing tag or logic statement). This will be added after the selected row |
Example: Attribute Breakdown
{
  "type": "Last Order Catalog",
  "label": "Women",
  "description": "Only people who ordered from the Women catalog",
  "before": "{% if lastOrder.catalog == 'Women' %}",
  "after": "{% endif %}"
}
- type: Groups this condition under “Last Order Catalog.
- label: Displays the name “Women” in the UI.
- description: Provides a helpful description for end-users: “Only people who ordered from the Women catalog.”
- before/after: Defines the template syntax for wrapping content, where the content is only shown if the recipient’s last order catalog is “Women.”
Custom UI for Display Conditions
You can extend this feature by creating a custom UI that allows your end-users to build their own conditions using an interface that you control. For example, you could display a custom modal where users select or build conditions before applying them to their email content.
unlayer.registerCallback('displayCondition', function (data, done) {
  // `data` contains the current display condition and a context object with the related element id

  // Open your custom UI for building display conditions
  // This could be a modal or any interface you control

  // Once the user has built or selected a condition, call the `done` callback
  // with the new condition.

  done({
    type: 'Last Order Catalog',
    label: 'Women',
    description: 'Only people who ordered from the Women catalog',
    before: "{% if lastOrder.catalog == 'Women' %}",
    after: '{% endif %}',
  });
});
In this example:
- data: This parameter contains the current display condition that the user is working with and a context object with the related element id.
- Custom UI: You can open your own modal or custom interface for the user to build or select a display condition.
- done(): After the user has selected or created a display condition, call the done function with the new condition. This condition will then be applied to the selected email block.
Example Workflow for Custom UI Implementation
- Open Custom Modal: When the user selects to add or edit a display condition, open a custom modal or interface where they can select or create a new condition.
- Define the Condition: In your custom UI, let the user define the display condition by selecting attributes like type, label, description, and conditions for showing the block.
- Pass the Condition Back to the Builder: Once the user finalizes the condition, pass it back to the builder by calling the
done()callback with the appropriatetype,label,description,before, andaftervalues. - Save and Apply the Condition: The condition is now applied to the block, ensuring that the content is shown only when the recipient meets the specified criteria.
Use Cases for Display Conditions
- Personalized Email Campaigns: Create targeted emails where different content is displayed based on recipient behavior, such as their gender, last purchase, location, or preferences.
- Dynamic Content: Use display conditions to dynamically alter content within a single email template, reducing the need to create separate emails for different audience segments.
- Advanced Segmentation: Set up advanced segmentation by defining custom conditions that control when specific blocks of content are shown to recipients.