
Merge Tags
Merge Tags allow end-users to dynamically insert personalized content into their emails. These placeholders are replaced with real values when the email is sent, making it easy to create highly personalized and dynamic emails. Merge tags can be inserted into a block of text by clicking the "Merge Tags" button in the text editor toolbar.
If no merge tags are provided during initialization, the "Merge Tags" button will not appear.
How Merge Tags Work
Merge tags are placeholders that are replaced by real data at the time of sending the email. For example, the merge tag {{first_name}} might be replaced with "John" when an email is sent to a recipient.
Unlayer supports all templating engines, whether they use curly brackets {{ ... }}, square brackets [ ... ], or any other syntax.
Initializing Merge Tags
To pass merge tags to the builder, use the mergeTags configuration during initialization. Each merge tag requires a name (what the user sees), a value (the actual merge tag in the templating engine), and a sample value for preview purposes.
Example: Passing Merge Tags
unlayer.init({
  mergeTags: {
    first_name: {
      name: 'First Name',
      value: '{{first_name}}',
      sample: 'John',
    },
    last_name: {
      name: 'Last Name',
      value: '{{last_name}}',
      sample: 'Doe',
    },
  },
});
In this example:
- first_name will be displayed as "John" in preview mode.
- last_name will be displayed as "Doe" in preview mode.
Grouping Merge Tags into Sub-Menus
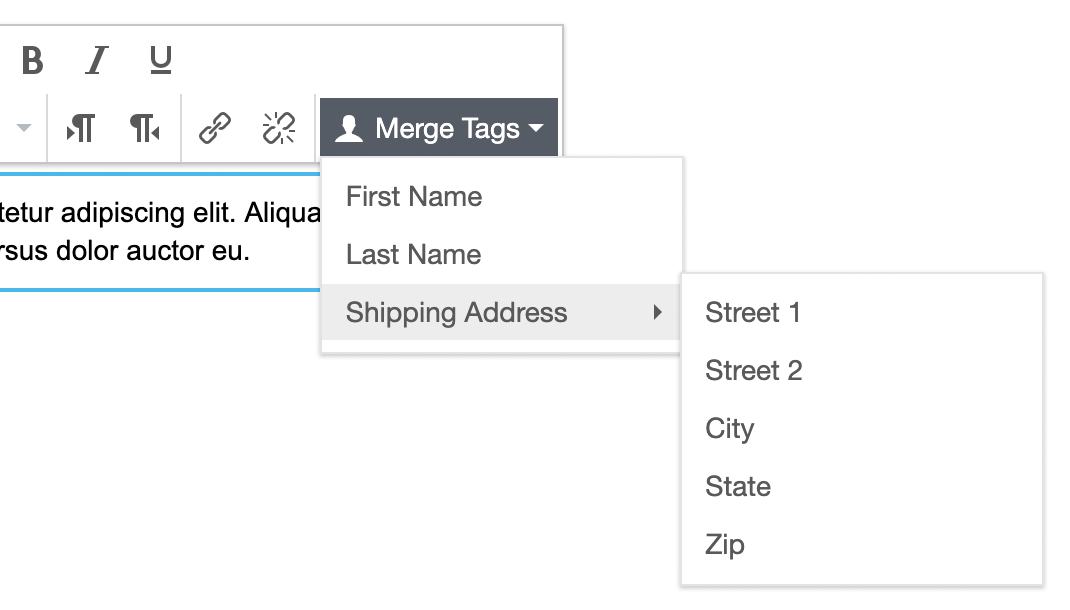
You can group related merge tags into sub-menus for better organization. This is useful for scenarios like grouping address fields under a "Shipping Address" menu.
Example: Grouping Merge Tags
unlayer.init({
  mergeTags: {
    shipping_address: {
      name: 'Shipping Address',
      mergeTags: {
        street_1: {
          name: 'Street 1',
          value: '{{shipping_address.address_1}}',
        },
        street_2: {
          name: 'Street 2',
          value: '{{shipping_address.address_2}}',
        },
        city: {
          name: 'City',
          value: '{{shipping_address.city}}',
        },
        state: {
          name: 'State',
          value: '{{shipping_address.state}}',
        },
        zip: {
          name: 'Zip',
          value: '{{shipping_address.zip}}',
        },
      },
    },
  },
});
In this example, the user will see a "Shipping Address" sub-menu with Street 1, Street 2, City, State, and Zip options.
Updating Merge Tags Dynamically
You can dynamically update merge tags after the builder has been initialized using the unlayer.setMergeTags() method.
Example: Dynamically Updating Merge Tags
unlayer.setMergeTags({
  first_name: {
    name: 'First Name',
    value: '{{first_name}}',
    sample: 'John',
  },
  last_name: {
    name: 'Last Name',
    value: '{{last_name}}',
    sample: 'Doe',
  },
});
Smart Merge Tags
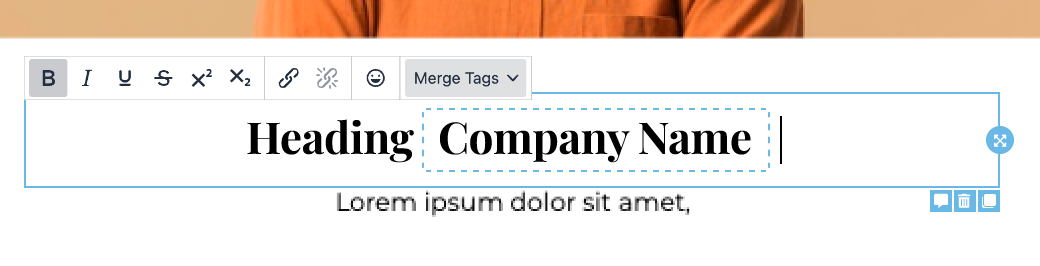
Smart merge tags improve the user experience by:
- Highlighting merge tags within text fields.
- Showing human-readable names (e.g., "Customer Name" instead of
{{ customer.name }}). - Allowing users to select, replace, and style merge tags easily.
Smart Merge Tags are enabled by default, but you can disable them:
unlayer.init({
  features: {
    smartMergeTags: false,
  },
});
Conditions and Looping
Run this example in our Examples page
Merge tags can be used to create dynamic content with conditions and loops. This allows for advanced personalization, such as displaying product lists or conditional content based on user behavior.
For example, if you want your users to create an order confirmation email template and show all products in that order, you would pass the "Products" merge tags along with some rules. The before and after of the selected rule will be added before and after the block in the exported HTML.
This before and after can be used to create loops or if-then-else conditions. The syntax will depend on which templating engine the host application uses. In this example, we are using Mustache templating engine.
If you want to add conditions to display content to different segments of audience, check Display Conditions.
Example: Adding Loops with Merge Tags
unlayer.init({
  mergeTags: {
    products: {
      name: 'Products',
      rules: {
        repeat: {
          name: 'Repeat for Each Product',
          before: '{{#products}}',
          after: '{{/products}}',
        },
      },
      mergeTags: {
        name: {
          name: 'Product Name',
          value: '{{name}}',
        },
        image: {
          name: 'Product Image',
          value: '{{image}}',
        },
      },
    },
  },
});
In this example:
- The "Products" merge tag group includes a rule for repeating content for each product.
- The
beforeandaftervalues define the loop in Mustache syntax.
When the loop is processed, each product will be displayed using the name and image merge tags inside the loop.
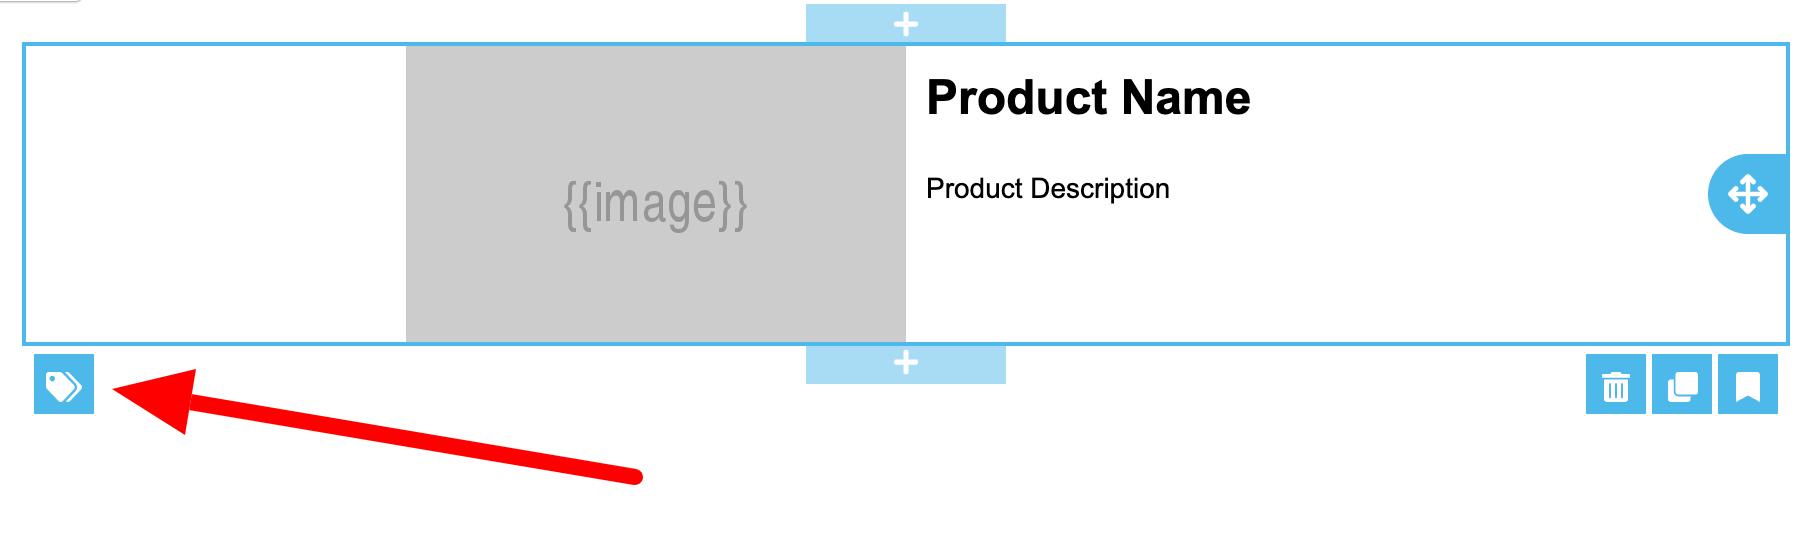
Specifying the rules will add an additional icon to the blocks in the editor. This icon will be used to select the merge tag group and rules.
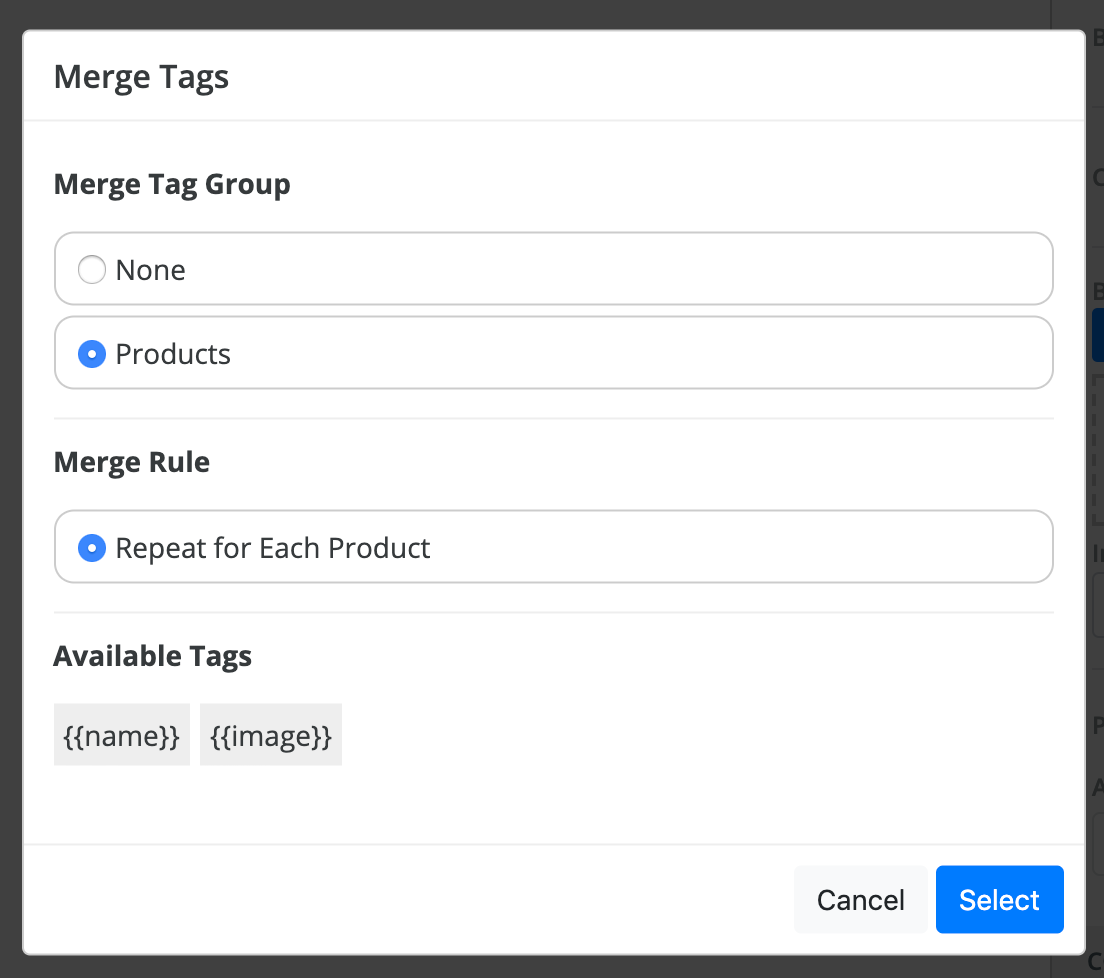
Once you click that icon, it will let users pick a merge tag group and a merge rule, and will show the available merge tags after selection. You can then use those tags any where inside that block.
Previewing Merge Tags
Sample values for merge tags can be provided using the sample attribute. These values are shown in preview mode to help users visualize what the final email will look like.
Example: Sample Merge Tag Values
unlayer.init({
  mergeTags: {
    first_name: {
      name: 'First Name',
      value: '{{first_name}}',
      sample: 'John',
    },
    last_name: {
      name: 'Last Name',
      value: '{{last_name}}',
      sample: 'Doe',
    },
  },
});
In preview mode, {{first_name}} will be replaced with "John," and {{last_name}} will be replaced with "Doe."
Autocomplete Menu Trigger
By default, the merge tag autocomplete menu is triggered by the first character of your merge tags. For example, if your merge tags look like {{ first_name }}, the trigger will automatically be {.
If you want to change the trigger character, you can do that like this.
unlayer.init({
  mergeTagsConfig: {
    autocompleteTriggerChar: '@',
  },
});
To disable the autocomplete feature, you can pass null.
unlayer.init({
  mergeTagsConfig: {
    autocompleteTriggerChar: null,
  },
});
Sorting Merge Tags
By default, merge tags are sorted alphabetically in the menu. You can disable sorting.
unlayer.init({
  mergeTagsConfig: {
    sort: false,
  },
});
Exporting HTML with Real Values
Replacing merge tags with actual values is done at the time of sending the email by the host application. Usually, the HTML should be parsed by your templating engine (Mustache, Nunjucks, etc) and the tags are replaced with real values.
In case you want to replace merge tags with real values at the time of exporting HTML, you can use the following examples.
Values
Replace {{ first_name }} with John and {{ last_name }} with Doe.
unlayer.exportHtml(
  function (data) {
    var json = data.design;
    var html = data.html;
  },
  {
    mergeTags: {
      first_name: 'John',
      last_name: 'Doe',
    },
  },
);
Conditions
The following example can be used to show or hide a block based on a true | false condition.
unlayer.exportHtml(
  function (data) {
    var json = data.design;
    var html = data.html;
  },
  {
    mergeTags: {
      products: {
        empty: true,
      },
    },
  },
);
Loops
The following example can be used to provide data to a loop.
unlayer.exportHtml(
  function (data) {
    var json = data.design;
    var html = data.html;
  },
  {
    mergeTags: {
      products: {
        repeat: [{ name: 'Item 01' }, { name: 'Item 02' }],
      },
    },
  },
);
Custom UI
You can extend this feature and allow users of the editor to build or choose merge tags using a UI that you control. For example, you can open a custom modal and show any interface to pick or build merge tags or rules.
Merge Tags
You can use this callback function to show custom UI to pick merge tags.
Example: Custom Merge Tag Picker UI
unlayer.registerCallback('mergeTag', function (data, done) {
  // data - contains current mergeTagGroup, current mergeTagRule, list of mergeTags and a context object with the related element id
  // done - callback function

  // Open custom UI for merge tags here
  // Once your user is done choosing a merge tag, call the "done"
  // callback function with the new merge tag.

  done({
    name: 'First Name',
    value: '{{first_name}}',
  });

  // Alternatively, you can use this api to pass a prefix and a suffix
  // This is useful if your custom UI allows adding multiple merge tags, for example,
  // so you could set a separator between each addition
  done({
    mergeTag: {
      name: 'First Name',
      value: '{{first_name}}',
    },
    prefix: '',
    suffix: ' ',
  });
});
Merge Tag Groups
You can use this callback function to show custom UI to pick merge tag groups and rules.
unlayer.registerCallback('mergeTagRule', function (data, done) {
  // data - contains current mergeTagGroup, current mergeTagRule, list of mergeTags and a context object with the related element id
  // done - callback function

  // Open custom UI for merge tag groups here
  // Once your user is done choosing a merge tag group and rules,
  // call the "done" callback function with the new merge tag group.

  // Reset the merge tag group and rules
  // done({
  //   mergeTagGroup: null,
  //   mergeTagRule: null,
  // });

  done({
    mergeTagGroup: 'products',
    mergeTagRule: 'repeat',
  });
});